
1. Locate the Sling Hook Catch, Sling Hook Mount, four of the Small Magnets, and two of the Assembly Screws.
2. Insert two of the Small Magnets into their respective holes on the sides of the Sling Hook Mount. It may be useful to lay the Small Magnets flat on a table, and pressing the Sling Hook Mount downward into them. This will require a small bit of force, as the fit is quite tight. Ensure that the magnets sit just below the surface of the side of the Sling Hook Mount.
Note: The local orientation of the magnets does not matter, as long as they both face the same direction.
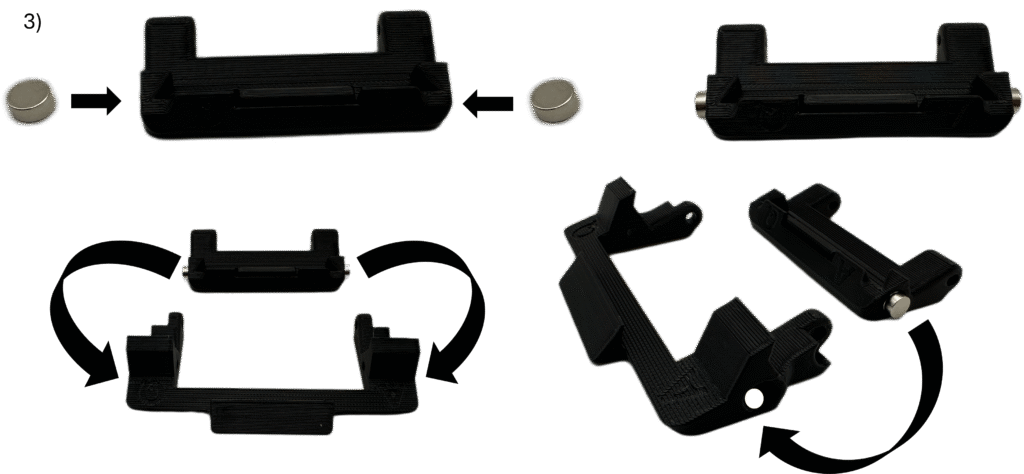
3. With two of the Small Magnets already pressed into the Sling Hook Mount, observe the polarity of the remaining two Small Magnets by letting them freely snap onto the free faces of the previously inserted Small Magnets. Ultimately, the goal will be to insert these remaining Small Magnets into their respective holes on the Slight Hook Catch while keeping this same polarity orientation.
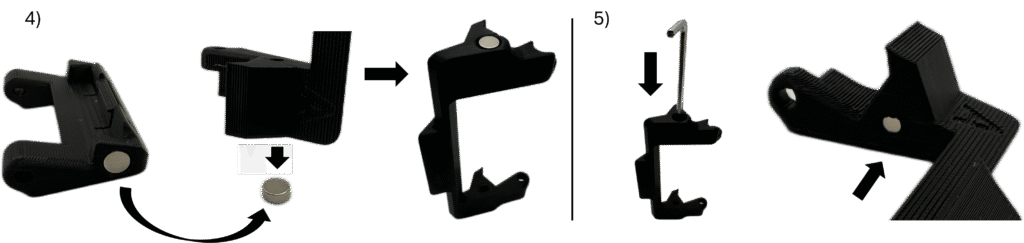
4. While keeping note of the correct orientation, remove the free Small Magnets from the side of the Sling Hook Mount and insert them into their respective holes in the Sling Hook Catch. It may be useful to lay the Small Magnets flat on a table, and pressing the Sling Hook Catch downward into them.
5. Use the 3mm Allen Wrench to push the Small Magnets as far down into the slot as possible.
Note: Alternatively, another method that can be used to ensure correct magnet orientation is by installing all of the magnets such that they face the same direction throughout the cross-section of the assembly.
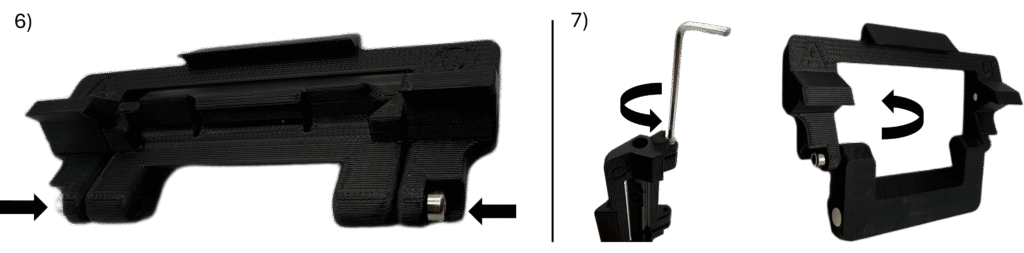
6. Insert the Sling Hook Mount into the Sling Hook Catch such that the holes for the Assembly Screws align. If it does not automatically snap together and want to hold position, it is possible the direction of the magnets in the Sling Hook Catch need reversed. They can be removed by poking them back out of the hole using the 3mm Allen Wrench from the inside – see the picture associated with step 5. If the assembly does snap together correctly, insert Assembly Screws into the holes and slowly tighten until secure.
7. Rotate each Assembly Screw from step 6 a single full rotation counterclockwise, unscrewing it just enough such that the Sling Hook Catch can freely rotate around the Sling Hook Mount without any sign of friction.
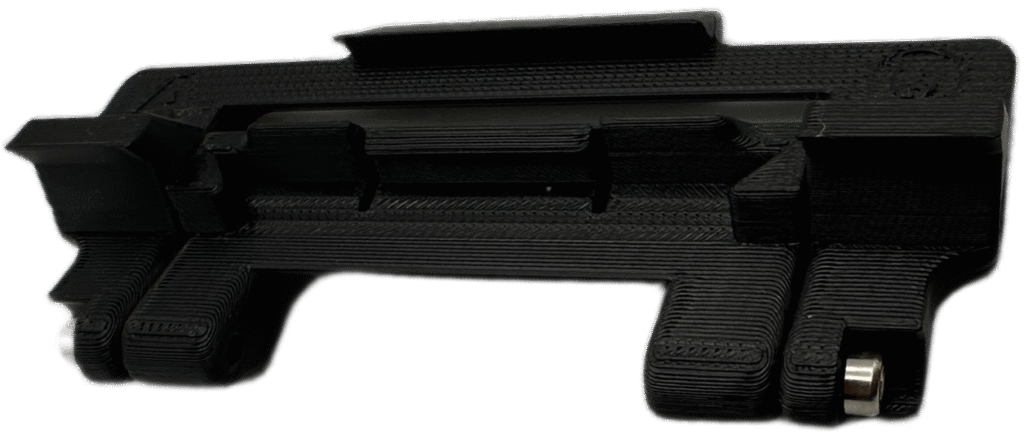
Sling Hook Assembly Complete!