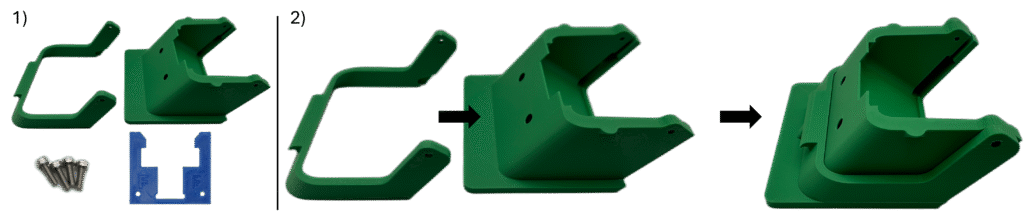
1. Locate the Front Base, Front Catch, Front Latch, and four Assembly Screws.
2. Nest the Front Catch onto the Front Base such that the holes near the edges of both parts align. It may take a bit of rotating to get it to sit properly as shown.
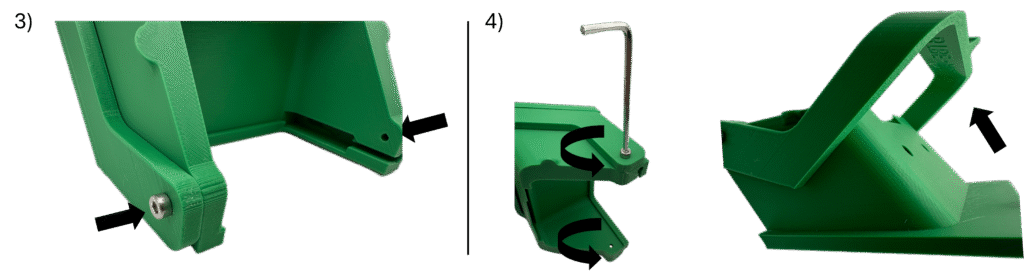
3. On each side, insert an Assembly Screw and slowly tighten until secure.
4. Rotate each Assembly Screw from step 3 a full rotation counterclockwise, unscrewing it just enough such that the Front Catch can freely rotate within its range of motion as shown.
5. Insert the Front Latch into the slot in the front of the Front Base and the holes in the Front Latch with the holes on top of the Front Base. At this point, double check to confirm that this is the Front Latch (this part has inscribed “F”s on top, as opposed to the Back Latch which has inscribed “F”s on top) and that the Front Latch is in the correct orientation (the inscribed “F”s should be facing upward)
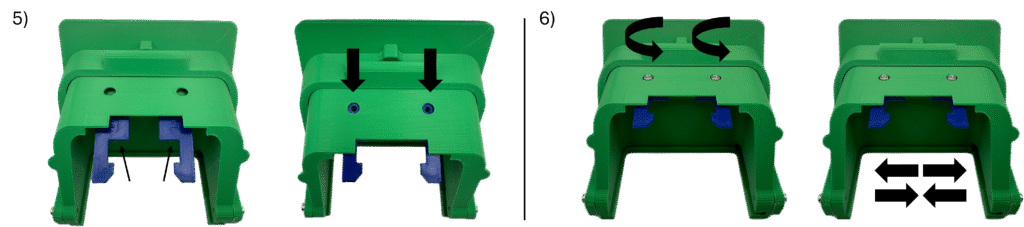
6. Insert the Assembly Screws and slowly tighten until secure. With the Assembly Screws fully secure, rotate them 1/8th of a turn counterclockwise to barely unscrew them, giving them a little bit of wiggle room. This should allow the Back Latch to slightly open if manually forced open.
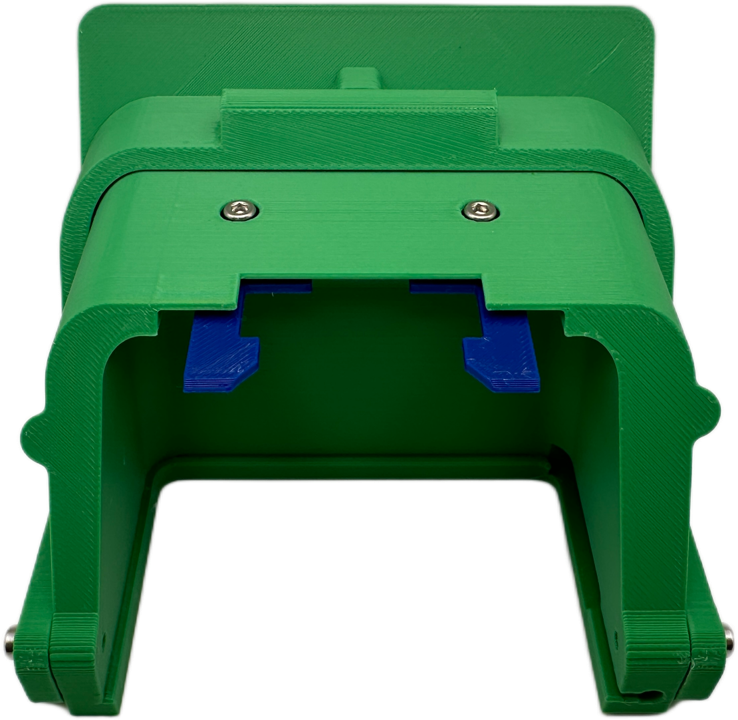
Front Assembly Complete!