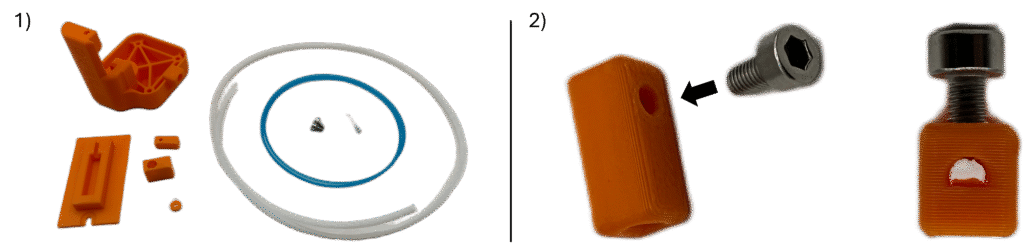
1. Locate the Top, Top Slider, Front Washer, Tension Block, Tensioner Tool, Tensioner Screws, Cable Spring, PTFE Tubing, and Cable.
2. Insert one of the Tensioner Screws into the circular hole in the Tension Block. Use the 3mm Allen Wrench to barely tighten – just enough for it to be secure, but cannot be seen through the center of the part.
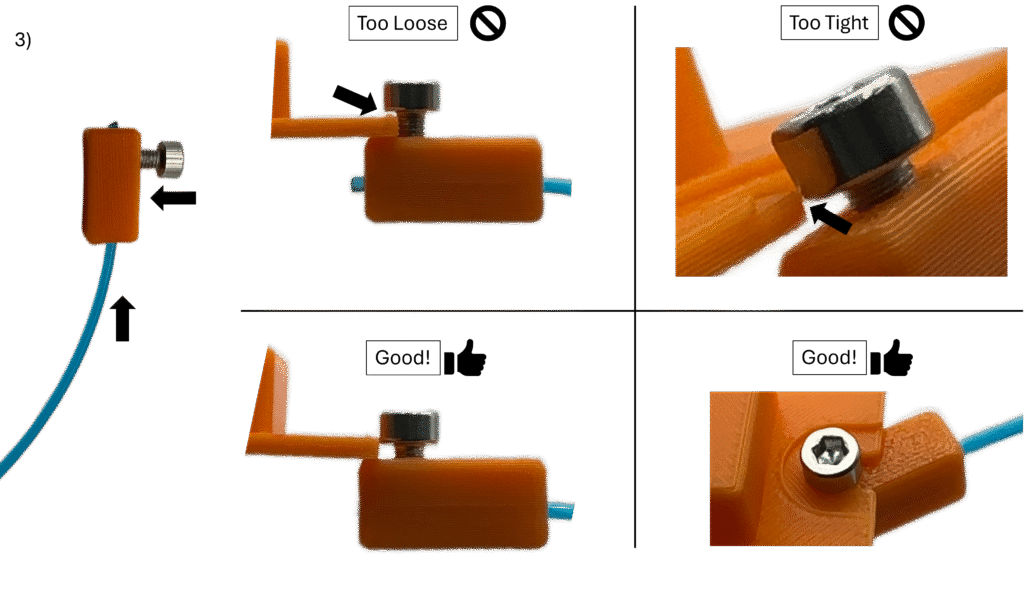
3. Insert the Cable into the Tension Block on the side furthest from the screw, such that it barely sticks out the other end. Slowly and carefully tighten the Tensioner Screw until the Head sits below the side edges of the Tensioner Tool, but can still freely slide into the circular slot cut out on the end of the Tensioner Tool. If the Tensioner Screw does not freely slide into this slot (or cannot be inserted) then the screw is too tight.
Note: Be very careful – it is incredibly easy to strip the Tension Block. If stripped, it may need reprinted. The Tension Block STL can be found in the repository of AutoQueue public parts here. Print 100% solid.
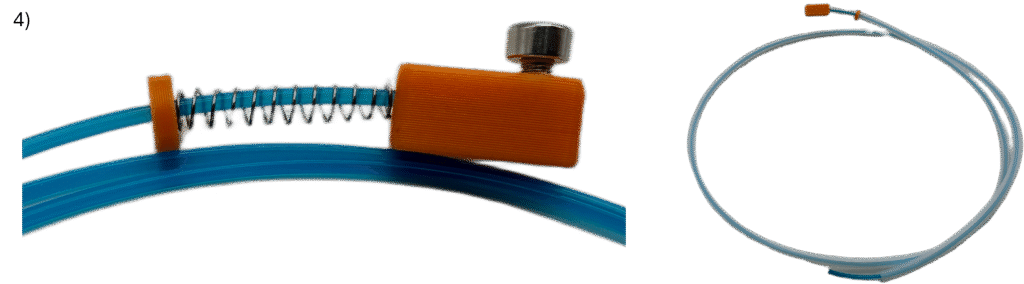
4. From the free end of the Cable, slide on the following items on in the following order as far as they can go: A) Cable Spring, B) Front Washer, C) PTFE Tubing.
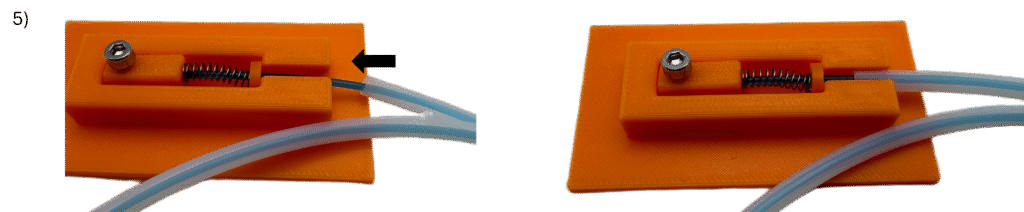
5. Slightly retract the PTFE tubing from the Front Washer, and slightly compress the Cable Spring such that the combination of the Tension Block + Tensioner Screw, Cable Spring, and Front Washer can sit inside the Tensioner Tool. Then, insert the PTFE Tubing into the hole on the side of the Tension Block as far as it can go (about halfway in as shown)
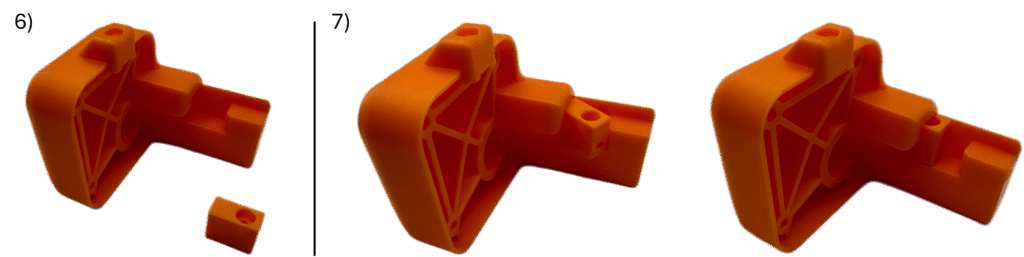
6. Locate the Top and Top Slider.
7. Insert the Top Slider into the sliding channel inside the Top as shown.
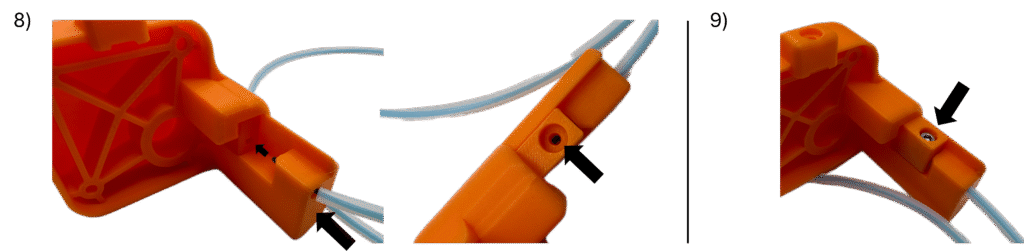
8. Insert the free end of the Cable into the hole at the bottom of the Top such that it barely sticks out into the channel. Align the Cable with the small hole in the side of the Top Slider, and push the cable into the Top Slider. Then, Insert the PTFE Tubing into the hole in the Top as far as it will go. You should be able to see the Cable through the vertical facing hole in the Top Slider.
9. Insert the remaining Tensioner Screw into the vertical facing hole in the Top Slider and slowly fully fasten until secure. While fastening, hold the Top Slider securely in place as shown, ensuring it does not move upward into the channel during the fastening process. Additionally, keep an eye on the Tensioner Tool, ensuring that the PTFE Tubing stays securely in place while fastening.
Note: Be very careful – it is incredibly easy to strip the Top Slider. If stripped, it may need reprinted. The Top Slider STL can be found in the repository of AutoQueue public parts here. Print 100% solid.

10. Test the assembly by manually pushing the Top Slider up the channel into the Top as far as as you can push it. Doing so should cause the Tension Block to be pulled into the Cable Spring. A full Cable Spring compression is ideal, however 1/4in of movement should also be fine.
If there is no movement, two things conventionally cause this issue:
A) Too much slack in the Cable – The PTFE Tubing on either the Tension Block end or Top end may have loosened during step 8. Please revert back to step 5 and try again.
B) Cable length is too short – the Tensioner Screw in the Top Slider never contacted the Cable. Please revert to step 4 and cut 1/4in off either free end of the PTFE Cable before continuing.
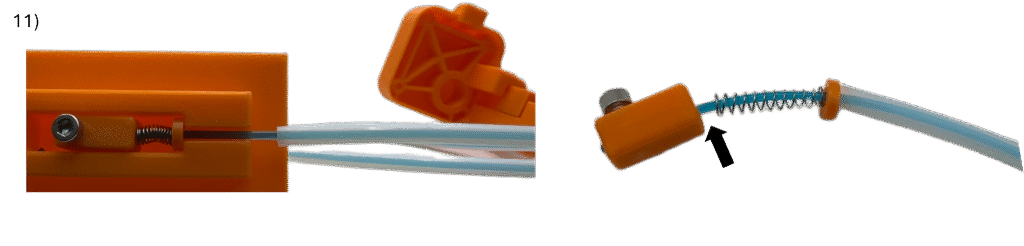
11. Remove the Tension Block + Tension Screw, Tension Spring, and Front Washer from the Tensioner tool by pulling the PTFE Tubing out of the side of the Tensioner Tool (this will compress the Tensioner Spring) and all of it should come out together. There may be slack/a considerable gap in between components in the line after removal – this should not be an issue.
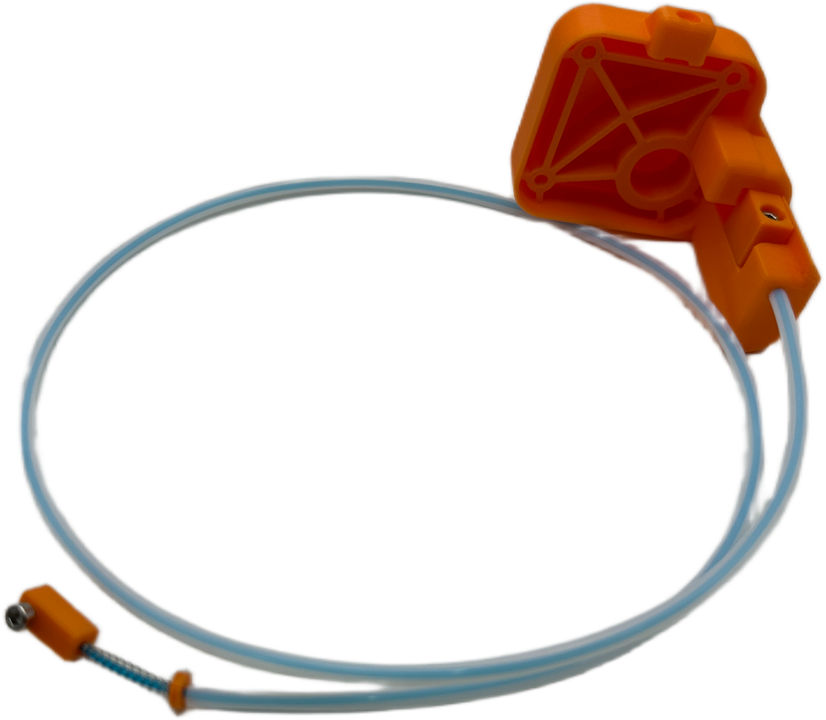
Top Assembly Complete!